What is Amazon Split Testing? Why Do It?
Split testing (also referred to as A/B testing or multivariate testing) is a method of conducting controlled, randomized experiments with the goal of improving a website metric, such as clicks, form completions, or purchases.
So what does this mean?
Amazon split testing is simply where you compare something (what that something is, we will discuss in a little bit) on your listing. This could be comparing two different photos, prices, bullets, descriptions, or anything else on the listing.
Why should you be split testing on Amazon? Amazon PPC is an effective marketing tool, but it can also be a very expensive one if all the basics and key strategies are not performed well. Using A/B Split Testing, digital marketers can further improve and optimize their campaigns to generate better and more targeted results.
How is this?
By split testing and optimizing your listing, you can find what images convert to more clicks to your listings, what price can sell more units at a more profitable rate, what increases your conversion rate leading to more sales, and much much more.
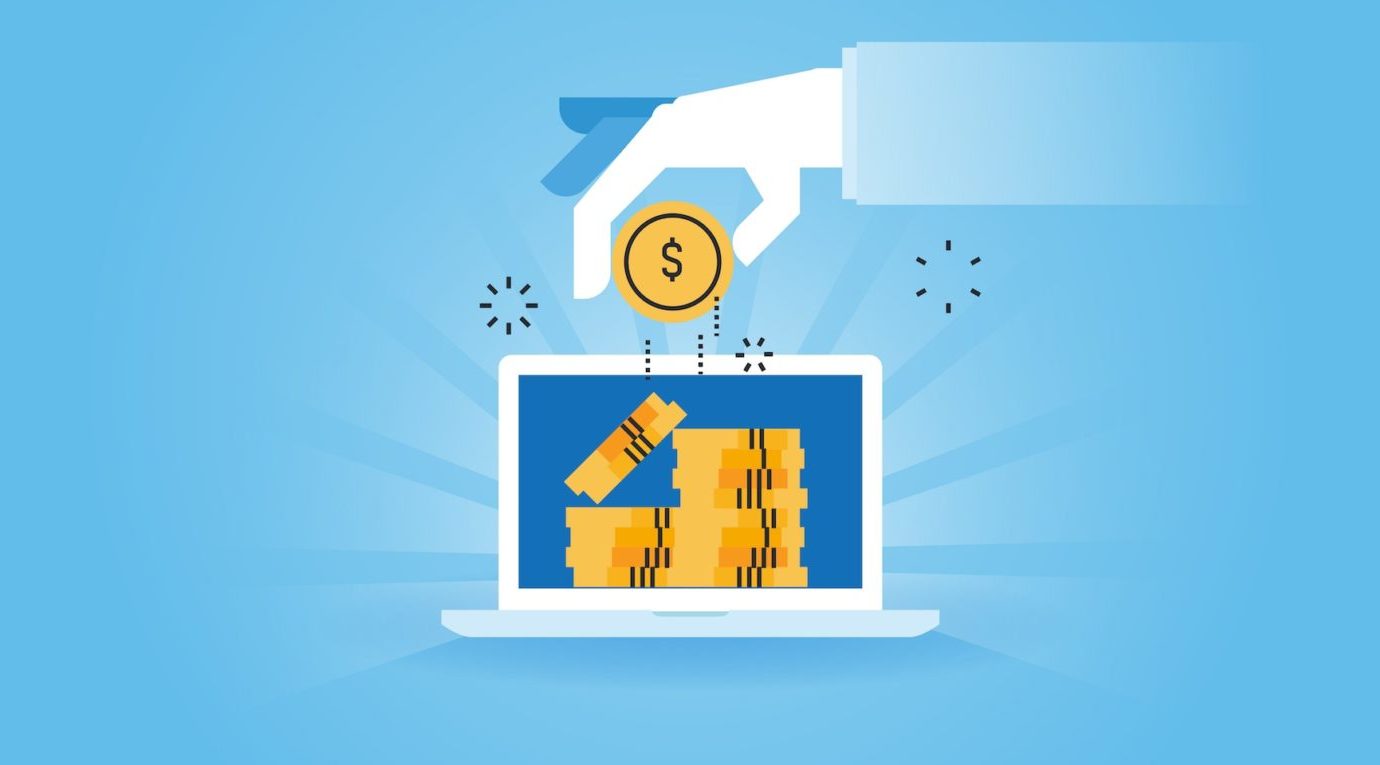
Here’s a quick example of split testing results and Amazon PPC:
Let’s say you sell an item for $20, have a conversion rate at 20%, and the average cost per click is $2.
Therefore after 100 clicks, you will have an Amazon PPC cost of $200 and would have made $400 in sales, therefore your average cost of sale (ACoS) would be 50% ($200 divided by $400 = 50%).
Let’s now say we split test the first photo and it increases our conversion rate to 25% with all other variables being the same. Now you have 100 clicks, an Amazon PPC cost of $200, but now you make $500 in sales, therefore your average cost of sale (ACoS) goes down to 40% ($200 divided by $500 = 40%).
This is like free money!!
Before I go into WHAT to split test on Amazon, let’s discuss some “golden rules” of Amazon split testing…
5 Golden Rules of Amazon Split Testing
- ONE VARIABLE AT A TIME. Only split test one factor at a time (whether that is title, price, bullets, photos, etc…). If you split test more than one factor, you will not know what caused the increase or decrease.
- PATIENCE. Amazon suggests running a test for at least 10 weeks (might be less if your listings have more traffic). DON’T declare a winner after a few days.
- MAKE BIG CHANGES. You’ll get faster, more meaningful results if you test a major theme vs. a smaller tweak. For example, for a main image test, don’t just test the angle of how your product appears, test the colour of the packaging.
- TEST WHAT MATTERS. Since testing directly on Amazon can take a long time, you can use a 3rd party split testing tool like ProductPinion to get shopper feedback on what’s worth testing and run preliminary split tests that take only hours to complete (more on that later)
- RECORD Make sure you document what it is your testing, why and who the winner and loser was.
What You Should Be Split Testing on Amazon…
I put this list in order of importance and most impactful. I would start at the top and move down from there.
- MAIN IMAGE – the first thing to split test is the main image. This is so important because it is what leads people into your listing and gets them to click to your product pages. Although we are restricted to a WHITE background without badges, you can still try different angles or product parts. Ask your photographer to get creative with the product and see what they come up with. Remember, think about different major “themes” to test instead of smaller variations.
- TITLE – the second thing to split test on a product is the title. This is where pulling your search term report is vital. You’ve heard me say it before and I will say it again. 20% of your search terms are driving 80% of your sales. The search term that is driving most of your sales NEEDS to be at the front of your title. You can also split test to see if a shorter, less keyword stuffed title works better in a sea of long titles. Also split test different benefits that your product offers. Pull these benefits from your search term report and from your customer reviews.
- PRICE – Try increasing your price for a period of time and see how it affects sales. Even a $1 pricing difference can increase your profit margin and give you more cash to use toward growing your business and paying yourself. A client of ours was struggling with profitability when we first took over her account. We raised her price by $10 right off the bat and sales didn’t slow down at all (she was VERY hesitant to do this too). Now we have an extra $200 to use everyday toward Amazon PPC, inventory, and paying her more. Side note… if you’re interested in seeing what we can do with your Amazon PPC, apply here.
- MAIN IMAGE… again. This is so important because it is what leads people into y our listing and gets them to click to your product pages. Use ProductPinion to quickly split test your main image ideas first, so you know which ones are worth testing on Amazon.
- A+ CONTENT and SECONDARY IMAGES – go to town on the secondary images. Look at the best sellers in your category and see what their images look like. Better yet, go to the best sellers on Amazon’s whole website and see what is doing best. Try different lifestyle images, man vs women, adults vs children (if it makes sense), infographics, colorful text images, and more.
- TITLE – Again, pull that search term report and test it again.
- BULLETS – VERY COMPLEX – do all benefit driven, all feature driven, mix of the two, shorter vs longer bullets, CAPS vs normal, change them all, change just one…
- PRICE – Try to test a higher price again. With ProductPinion, you can also split test things like if a sale price of $29.99 is better vs. a price of $34.99 with a $5 coupon.
How to do an Amazon AB test using ProductPinon
While you can jump straight into split testing using Amazon’s free Manage Your Experiments tool..
You’ll get much faster results if you first use software like ProductPinon where you’ll get results in hours, not weeks.
They have their own audience of thousands of shoppers that will also give you their opinions on WHY they chose the option they did.
So, the idea here is to first test a bunch of concepts and then decide which ones are worth moving over to Amazon’s Manage Your Experiences tool. You can also test other things like brand names, logos, packaging and more.
Lets see it in action
- SIGNUP Go to www.productpinion.com (affiliate link) and start a free trial.
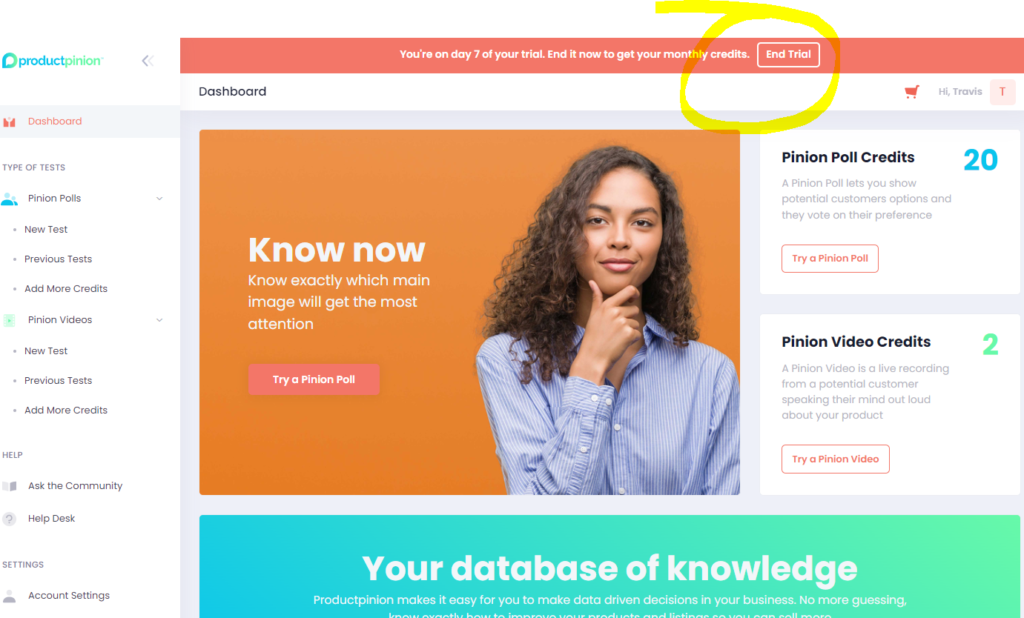
2. GET CREDITS Once you sign up, you’ll have the option to end the trial so you have your split testing credits available immediately
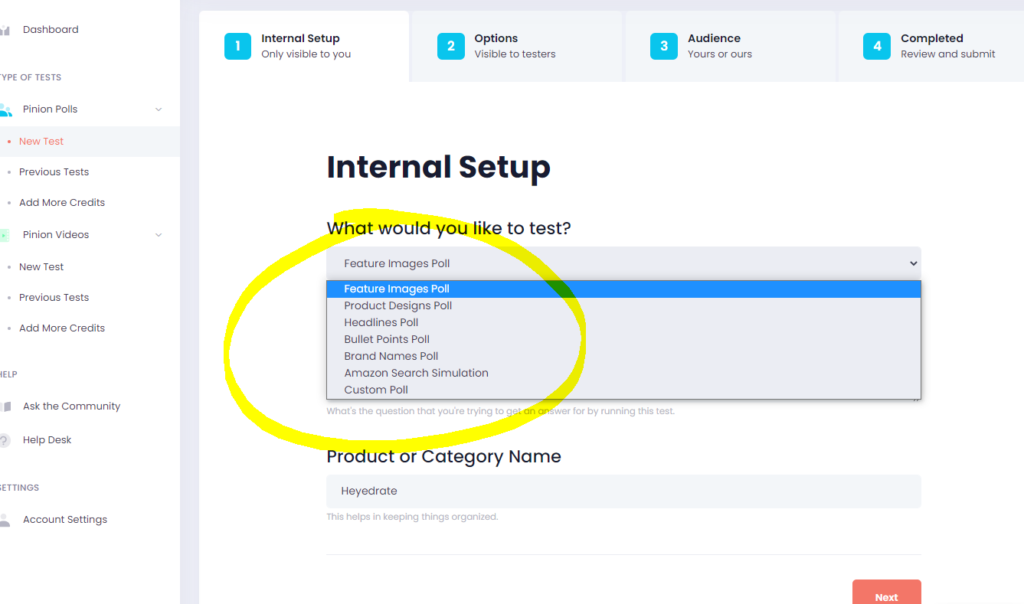
3. SETUP THE TEST Under Pinion Polls, click the new test and select a poll type. In this example, we’re going to be testing two variations of a logo so we’ll select “Featured Images Poll”
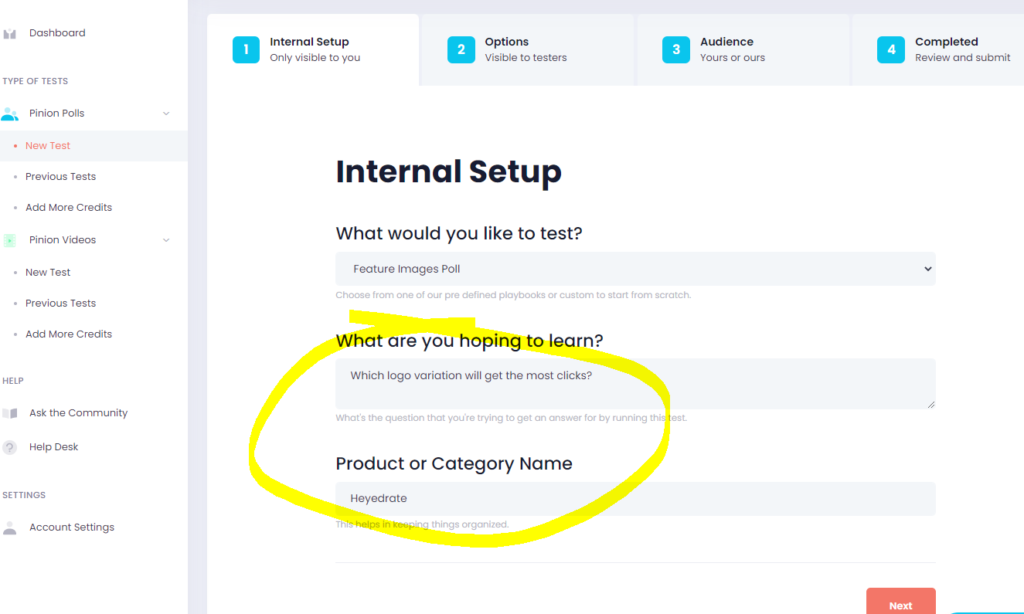
Remember how recording with split testing is one of the golden rules? Well here you can write out a hypothesis – what it is you’re trying to learn. You can also organise your tests by product name, category or even ASIN:
Next, write a short question that you want to ask Amazon shoppers and upload your image options:

And then, you get to choose the audience. There are basic demographics as well as advanced.
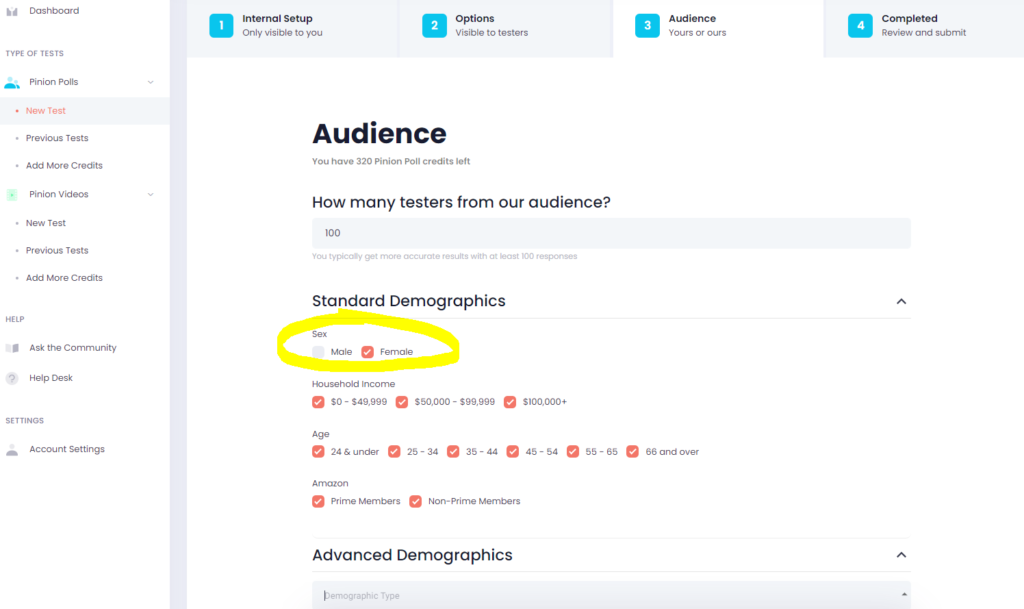
And that’s it – launch the test!
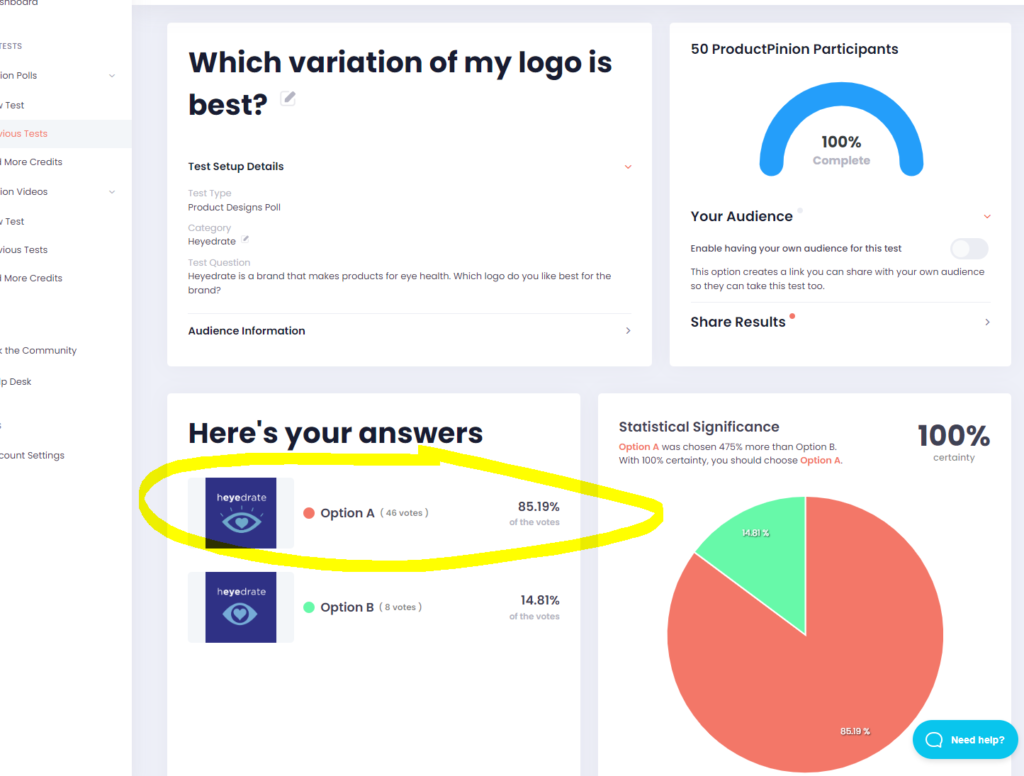
4. SEE THE RESULTS. You’ll see responses come in right away and in an hour or two you’ll get results on which image option is better. In our case, we have a clear winner:
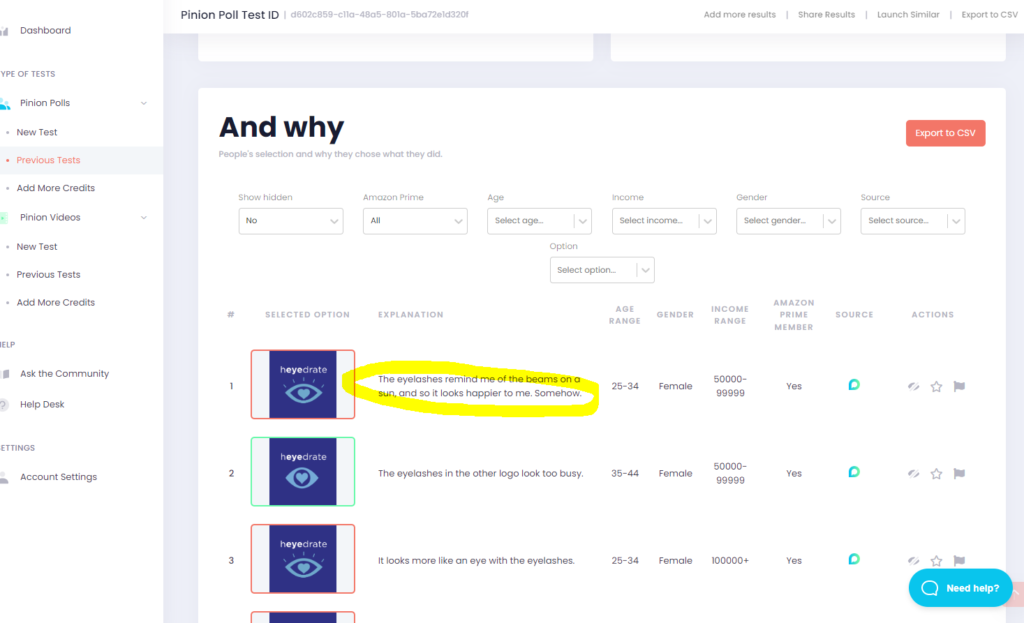
You can also see why people chose the way they did. Here’s the results you can see for yourself:
https://www.pinionresults.com/pinion-poll-results/2gbWdZMBGvrzRanxp3B3oReRFReOX_uAgG7_vDWidA0
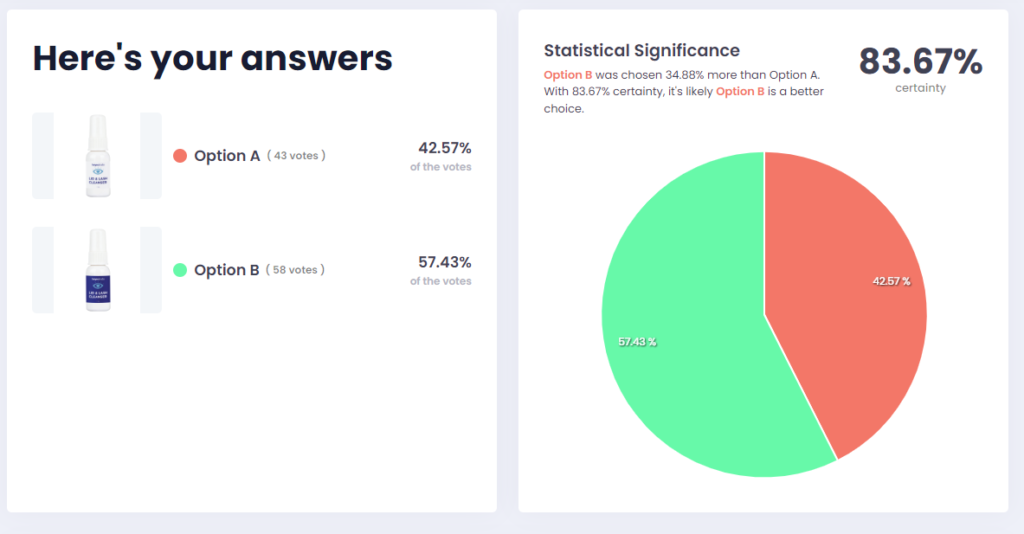
Now, keep in mind, you can do split tests on almost anything related to your Amazon listing. In another test, we wanted to see if dark colored packaging as our main image would make a difference (turns out, it does!)
When you have some winning results with ProductPinion, you can then put them into Amazon’s tool to further verify the impact on your business.
How to do an Amazon ab split test using Amazon’s free tool called Manage Your Experiments
Amazon also lets you split test elements of your listing. Keep in mind, you have to have Brand Registry as well as have an ASIN with a decent amount of traffic to be eligible.
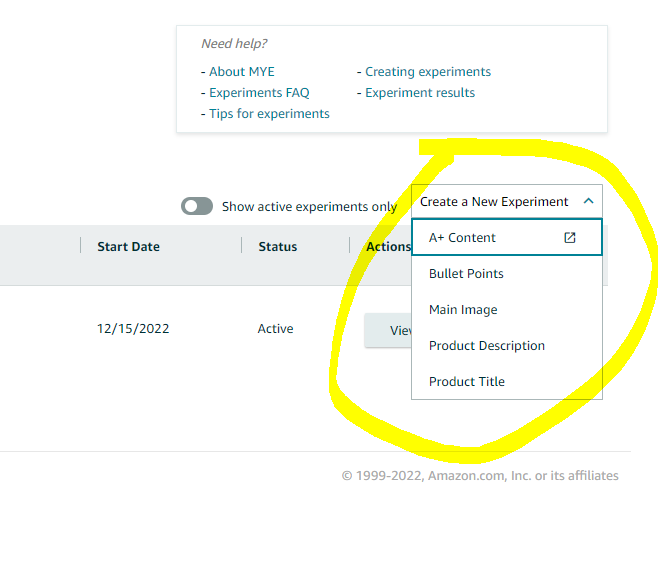
STEP 1 Open Manage Your Experiments by going to “Brands” and then “Manage experiments”
STEP 2 Just like with ProductPinion, you can name your experiment and add your hypothesis of what you think the the results will be.
By default, Amazon suggest 10 weeks to run the experiment, but you can also have it running until it reaches significance (which basically means that to a very high degree of certainty, you can say that one image is better than the other)
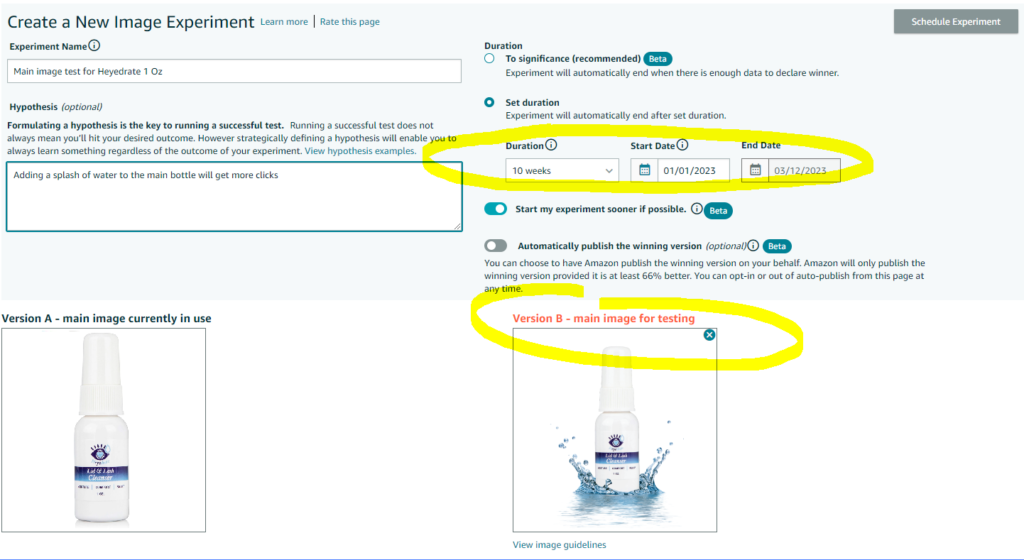
Hit launch, and you’re good to go. And keep in mind, while this test is running for 10 weeks, you could be testing other concepts and ideas inside of ProductPinion too.
What does Amazon suggest you be testing?
After looking into Amazon’s own articles on what they suggest to be testing, I came across this suggestion:
Reducing product title length to under 100 characters to reduce noise and encourage more customers to visit your detail page.
That really stood out to me.
The general rule or best practice is making sure to include as many keywords as possible into your title.
But, some sellers take this too far and the end result is a bunch of spammy looking titles that aren’t human readable and don’t help a shopper – actually, well, shop.
Which is exactly what Amazon doesn’t want. And, they’ve probably noticed higher click throughs on shorter titles. Hint, hint, nudge nudge?
So, what you could do is come up with 2 or 3 shorter title options (under 100 chars as Amazon suggests) that are human readable but still contain your main couple keywords.
Be sure to pull your search term report!
And, don’t worry, you can always include the keywords you removed from your old title in your bullets so you’re still indexed for them.
Next, run Pinion poll using the 2 or 3 shorter title options (similar to how the image one was run as shown previously) and see which one comes out a winner.
You’ll then take that winner and plug that into Amazon’s Manage my experiments to go head to head with your current long title.
And bam, another data point pon your way to optimising your listing with data.
In conclusion…
If you’re not split testing, you’re leaving money on the table. Period.
The most important things to test are you main image and title, but price, secondary images, bullets and other aspects such as packaging are important too.
The five golden rules of split testing are testing one variable at a time, having patience, making bigger changes, testing what actually matters and recording the results so you learn from the test.
If you really want to get results fast, use a high tempo testing platform like ProductPinion.
Why?
Amazon’s split testing takes at least 1-2 months to get results (and is only eligible for brand registered ASINS with good traffic).
With ProductPinion, you can test anything quickly, and figure out what’s actually worth waiting 1-2 months for with Amazon’s testing tool.
So for example, if you were to do the title test above using ProductPinion first, you’d be short cutting your success by about 3-6 months if you’re testing 3 titles.
That’s it for Amazon split testing. It’s pretty simple but can add a lot of profit to your Amazon sales.
Thanks to Matt Kostan for cowriting this article with me. Check out his software at http://www.productpinion.com/
Ready to Scale Your Amazon Business and Amazon PPC?
Have you taken my Amazon PPC Masterclass? Click here to join our free community get the free Amazon PPC Masterclass. This is an actionable lesson with an SOP and video to take your Amazon PPC to the next level.
Each lesson is also below.
- Step 1 – Track and Measure Your Results
- Step 2 – Research Your Competitors
- Step 3 – Simplify Your Amazon Keyword Research
- Step 4 – Amazon Listing Optimization
- Step 5 – Set Up Your Amazon PPC Campaign
- Step 6 – SCALE your campaigns.
- Step 7 – Optimizing Keyword Bids for Increased Profitability
- Step 8 – 9 Best Amazon PPC Auto Campaigns Hacks and When to Use Auto Campaigns
- Step 9 – Product Targeting Ads
- Step 10 – How To Calculate Bid Adjustment for Top of Search
- Bonus – SIGNIFICANTLY Boost Your Amazon PPC Sales With This EASY Strategy
- Bonus – Amazon ACoS Explained, Calculating Your Breakeven ACoS [WHAT YOU SHOULD REALLY MEASURE]
If you want support in this Amazon PPC journey, this is where I can help.
All you need to do is fill out this form to apply to work with us.
After filling out the form, I will get back to you within 48 hours to see how I can help!
Talk soon,
![How to Create a Shipping Label for Amazon FBA [WITH VIDEO]](https://salesfunnelhq.com/wp-content/uploads/2020/01/How-to-Create-a-Shipping-Label-in-Amazon-FBA-Seller-Central-e1579721554488.png)